
There is a distinct difference between giving a classic car a cosmetic refresh and diving headfirst into a true, bare-metal, frame-off restoration. A refresh might involve a new coat of paint, some polished chrome, and a tune-up to get the vehicle ready for a weekend cruise. A full restoration, however, is a monumental undertaking. It is the process of taking a vehicle that has been battered by decades of weather, wear, and neglect, disassembling it down to its fundamental components, and rebuilding it to a standard that often exceeds how it looked the day it rolled off the assembly line.
Taking on a project of this magnitude requires an immense amount of commitment. It is not merely a financial investment; it is a massive drain on your time, your garage space, and your emotional bandwidth. You will inevitably encounter seized bolts, rust holes where solid metal should be, and parts that seem entirely impossible to source. It requires patience, a willingness to learn complex mechanical and chemical processes, and the persistence to see a multi-year project through to the end.
In this comprehensive guide, we will walk you through the entire roadmap of a full restoration. From the initial, meticulous teardown to the final shakedown run, you will learn the step-by-step processes required to bring a piece of automotive history back to life. Whether you are aiming for a factory-correct, numbers-matching show car or a modern-performing restomod, the foundational steps remain the same.
Phase 1: Meticulous Planning and the Teardown Process
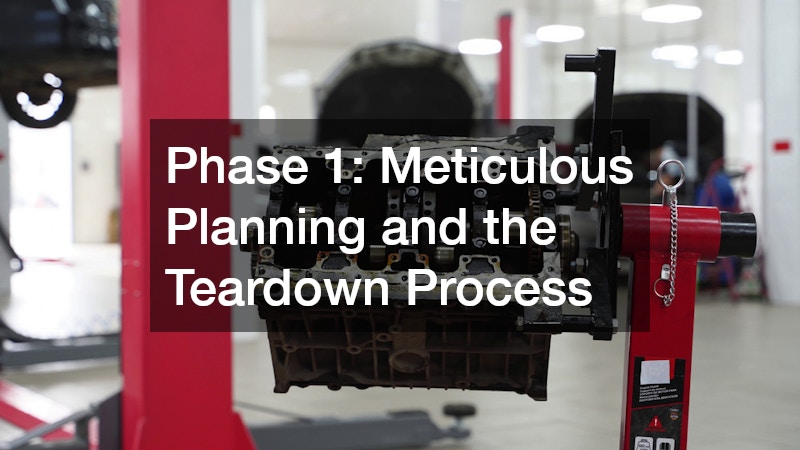
The most common mistake amateur restorers make happens on the very first day: they grab a wrench, start unbolting panels, and throw all the hardware into a single coffee can. Months or years later, when it is time for reassembly, that coffee can becomes a nightmare. Proper preparation and a meticulous teardown process are the bedrocks of a successful build. This phase is about setting yourself up for success so you do not get overwhelmed once the car is completely apart.
Catalog Every Single Bolt, Bracket, and Wire
Organization is your best friend during a teardown. You need a systematic approach to cataloging every component, no matter how small or seemingly insignificant.
-
The Bag and Tag Method: Purchase boxes of heavy-duty ziplock bags in various sizes, a pack of permanent markers, and masking tape. As you remove a component—say, the alternator—place all its mounting brackets, bolts, and washers into a bag. Label it clearly: “Alternator mounting hardware, front passenger side engine block.”
-
Extensive Photographic Evidence: Do not rely on your memory or a factory service manual alone. Before you disconnect a wiring harness or unbolt a vacuum line, take clear, well-lit photos from multiple angles. Document how cables are routed, which holes in the firewall they pass through, and the order in which shims are stacked.
-
Space Management: A disassembled car takes up roughly three times the space of an assembled one. Set up a dedicated parts storage area with sturdy shelving. If your home garage is too small for major operations like separating the body from the chassis or hoisting the engine block, do not force it. Outsourcing the heavy lifting and chassis separation to a local auto repair shop can save you massive amounts of time and prevent serious injury, allowing you to bring the separated components back home to work on individually.
Secure the Vehicle’s Entry Points Early
When dealing with a classic car, the small, intricate mechanisms often present the most frustrating hurdles. Door latches, trunk locks, and ignition cylinders have endured decades of use, accumulating dirt, hardened grease, and mechanical wear.
-
Catalog Intricate Mechanisms: Remove door latches, window tracks, and lock cylinders early in the teardown process before tackling the main interior wiring harness. Take extreme care not to bend the delicate linkage rods that connect the interior door handles to the latch assemblies.
-
Address Tumblers and Keys: Often, project cars come with a single, heavily worn key, or perhaps no keys at all. Forty-year-old lock tumblers are frequently frozen solid or entirely missing internal pins. Because re-keying or rebuilding these tiny, complex mechanisms requires highly specialized tools and knowledge, this task is best handed off to specialized auto locksmiths while you continue with the heavier teardown work. They can rebuild the cylinders to match a single, brand-new key, saving you headaches during final assembly.
Phase 2: Engine and Drivetrain Revitalization
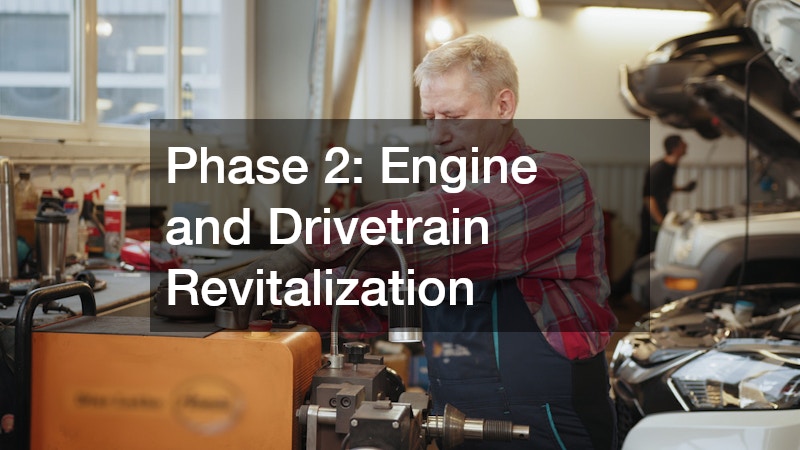
The engine and drivetrain form the mechanical heart and soul of your vehicle. A beautifully painted car is merely a large paperweight if it cannot reliably move under its own power. Revitalizing these components requires precision, cleanliness, and an honest assessment of what can be salvaged versus what must be replaced.
Assess the Engine Block’s Integrity Before Ordering Parts
It is tempting to immediately order flashy aftermarket camshafts, intake manifolds, and aluminum cylinder heads. However, until you know the condition of your engine’s foundation—the bare block—you should not spend a dime on performance parts.
-
Machine Shop Processing: Completely disassemble the engine down to the bare cast iron or aluminum block. Send it to a reputable machine shop to be hot-tanked (a chemical bath that removes decades of grease, scale, and carbon) and magnafluxed. Magnafluxing uses a magnetic field and special dust to reveal microscopic, structural cracks in the metal that are invisible to the naked eye.
-
Measuring Clearances: The machinist will also check the cylinders for out-of-roundness and taper. If the cylinder walls are heavily scored, the block will need to be bored over, which dictates the size of the new pistons and rings you must purchase.
-
Choosing Your Path: You must decide between rebuilding the original, numbers-matching engine to preserve historical value, or dropping in a modern crate motor for better reliability and power. If you opt for a complex, period-correct rebuild but lack the precise measuring tools (like micrometers and dial bore gauges), finding a provider specializing in classic auto repair services is a smart investment to ensure the rotating assembly is balanced and assembled perfectly.
Don’t Neglect the Gearbox Linkages and Seals
While the engine often gets all the glory, the transmission dictates how that power is delivered to the ground. A gorgeous restoration is quickly ruined by a gearbox that pops out of second gear, grinds during downshifts, or leaves a massive puddle of fluid on your driveway.
-
Address the Component While It Is Out: The best time to service a gearbox is when it is sitting on a workbench, not when it is crammed into a dark, tight transmission tunnel. Replace all external shift bushings, input and output shaft seals, and the entire clutch assembly (disc, pressure plate, and throwout bearing) while you have full access.
-
Internal Overhauls: If the history of the gearbox is unknown, or if the fluid smells burnt and is filled with metallic glitter, a full internal rebuild is necessary. Replacing worn synchronizer rings, bearings, and planetary gears requires specific pullers and presses. Emphasize to yourself that performing a comprehensive auto transmission repair while the shell is entirely empty and accessible is infinitely easier, cheaper, and less frustrating than having to drop the exhaust and driveshaft to do it on your back a year after the car is painted.
Phase 3: Suspension, Steering, and Stopping Power
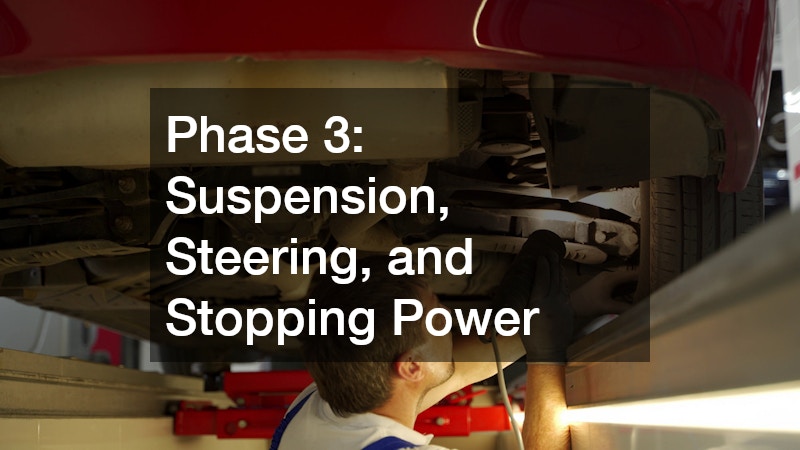
Classic cars look fantastic, but driving them often reveals terrifying realities about vintage automotive engineering. The suspension systems were soft, the steering boxes were vague, and the braking capabilities were, by modern standards, dangerously inadequate. This phase of the restoration focuses heavily on safety, drivability, and ensuring the car can handle modern traffic conditions.
Upgrade to Modern Stopping Standards
If there is one area of a classic car where originality should be sacrificed in the name of safety, it is the braking system. Classic cars simply cannot decelerate at the same rate as the modern SUVs sharing the road with them today.
-
Ditch the Drum Brakes: Many vintage vehicles came equipped with four-wheel drum brakes and a single-bowl master cylinder. If a brake line fails in a single-bowl system, you lose all braking power instantly. Upgrading to a dual-bowl master cylinder (which separates the front and rear brake fluid circuits) is a mandatory safety upgrade.
-
Front Disc Conversion: Converting at least the front wheels to a modern disc brake setup will drastically reduce your stopping distance and eliminate the terrifying “brake fade” associated with overheating drums.
-
Plumbing: Do not reuse 40-year-old steel brake lines. They rust from the inside out. Investing heavily in high-quality brake repairs, bending entirely new rigid NiCop (nickel-copper) hard lines, and installing stainless steel braided flexible hoses at the wheels is an absolute, life-saving necessity.
Replace All Worn Bushings with Polyurethane
The suspension geometry of a car relies on pivoting joints to absorb bumps and keep the tires planted. These pivot points are isolated by rubber bushings, which degrade, dry rot, and crumble over decades.
-
The Removal Process: Removing old bushings from control arms, leaf springs, and sway bars is dirty, difficult work. It often involves using an oxy-acetylene torch to melt the old rubber out, followed by a hydraulic press to push out the outer metal sleeves.
-
The Upgrade: Replace the factory rubber with modern polyurethane bushings. Polyurethane does not degrade from oil or UV exposure and is significantly stiffer than original rubber. This eliminates the “wandering” feeling common in classic steering, providing a much tighter steering response, better cornering stability, and an overall modernized road feel. Also, replace all ball joints, tie rod ends, and shock absorbers to complete the handling transformation.
Phase 4: Addressing the Chassis and Exterior Shell
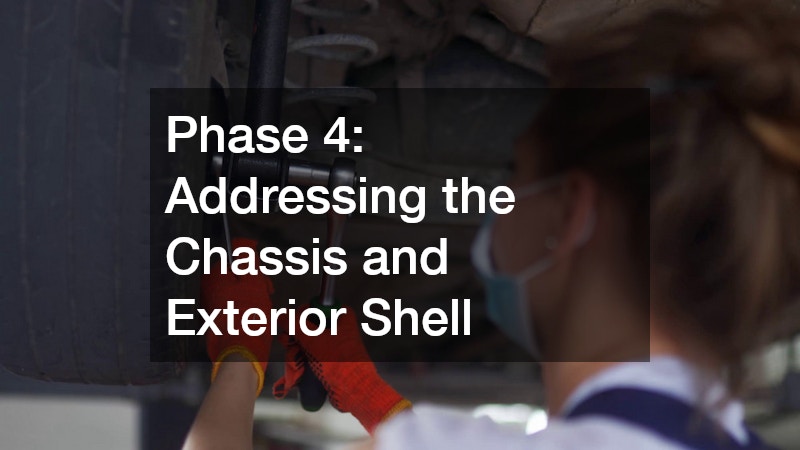
This phase is where the most dramatic visual transformations occur, but it is also where the most hidden horrors are uncovered. Metalwork requires patience, specialized tools, and a strict adherence to doing things the right way. Covering rust with fiberglass or body filler is a cardinal sin of restoration; it will inevitably bubble up and ruin your expensive paint job within a few years.
Eradicate Rust Down to the Bare Metal
To properly restore a car’s body, you must start with a completely clean canvas. You cannot accurately assess the health of the metal while it is hidden beneath layers of old paint, primer, and previous, potentially botched repairs.
-
Stripping the Paint: Avoid using heavy grinding wheels, which remove healthy metal and create heat that can warp large, flat panels like the hood or roof. Instead, use media blasting (such as crushed glass, plastic beads, or walnut shells) to gently strip the paint and body filler without damaging the underlying steel. Chemical dipping is another excellent option for entire shells, as it neutralizes rust even inside the hollow frame rails.
-
Cutting and Welding: Once the bare metal is exposed, use a sharp awl to aggressively poke at any suspicious, pitted areas. If the metal flakes away or the awl pushes through, that section must be completely cut out using an angle grinder. You must weld in fresh, custom-fabricated patch panels. Unless you are an expert at MIG or TIG welding and understand heat control, this is the stage where contracting a high-quality auto body service is crucial to guarantee a perfectly smooth canvas and structurally sound metal repairs.
-
Sealing the Metal: Immediately after the metal is bare and repaired, it must be coated in a two-part epoxy primer to seal it from oxygen and moisture, preventing flash rust from forming.
Straighten the Frame Using Laser Alignment
A car’s frame or unibody structure is the foundation upon which everything else rests. If the foundation is crooked, the doors will never align, the suspension will never track straight, and the panels will have uneven, unsightly gaps.
-
Checking for Squareness: Decades of hard driving, launching at drag strips, or undocumented fender benders can twist a chassis out of factory specifications. Even seemingly minor impacts from the 1970s might have left the frame slightly diamond-shaped.
-
The Pulling Process: Mount the bare frame or shell onto a specialized pulling jig. Utilizing professional collision repairs techniques, complete with computer-guided laser measuring systems, allows technicians to pull, push, and hydraulically force the steel back to its exact, millimeter-perfect factory squareness. Doing this before any bodywork or reassembly ensures the car will drive safely and look flawless.
Phase 5: Tackling the Windows and Weatherseals

A fully restored car might look stunning, but if wind whistles through the doors at highway speeds or rain leaks onto your fresh carpet, the driving experience will be miserable. This phase is about making the cabin airtight, watertight, and acoustically pleasant, which requires attention to the glass and the rubber seals that surround it.
Source OEM-Spec Weatherstripping for a Watertight Seal
The rubber weatherstripping on a classic car serves a critical function: it keeps the outside elements out. Over time, original seals become brittle, shrink, and crack, allowing water to pool in floor pans and rust the vehicle from the inside out.
-
Preparation is Key: Do not simply glue new weatherstripping over old adhesive. Use adhesive removers, plastic scrapers, and fine wire wheels to completely clean out the metal channels around the doors, trunk, and cowl. Paint these hidden areas to prevent future rust before installing the new seals.
-
Model-Specific Kits: Avoid generic, cut-to-length rolls of rubber. Purchase complete, high-quality weatherstripping kits molded specifically to the exact year, make, and trim of your car. These will feature the correct molded corners and push-pin locations. Furthermore, relying on professional auto glass services can help source rare, model-specific metal clips, stainless steel moldings, and the correct butyl tape required to properly seat stationary glass without cracking it.
Buff Minor Scratches, but Don’t Compromise on the Windshield
Original glass often carries factory date codes, making it desirable for purists. However, preserving original glass requires careful evaluation of its condition.
-
Restoring Side Glass: Side windows and the rear windshield are typically made of tempered glass. If they feature minor water spots, haze, or very light vertical scratches from rolling up and down against worn felt guides, they can often be salvaged. Using a dedicated glass polishing compound and a dual-action polisher equipped with a rayon pad can remove minor imperfections and restore clarity.
-
The Windshield Reality: The front windshield is subjected to decades of sand, rocks, and wiper blade friction. This creates microscopic pitting across the entire surface. While it might look acceptable in the garage, this pitting catches the light of oncoming headlights at night, creating a blinding, dangerous glare. Opting for a full auto glass replacement is heavily recommended for the front windshield; the massive upgrade in safety and optical clarity far outweighs the loss of a factory date code.
Phase 6: Reviving the Interior Cabin
The interior is where you will spend all of your time once the car is finished. It should be a place of comfort, tactile pleasure, and ergonomic satisfaction. Reviving the cabin involves more than just throwing slipcovers over old seats; it requires rebuilding the interior from the floorpans up.
Restore the Bare Seat Frames Before Adding Foam
Vintage car seats are essentially a collection of metal springs, burlap, cotton batting, and vinyl. Decades of humidity and human sweat cause the internal steel frames to rust aggressively.
-
Rebuilding the Foundation: Do not put brand new, expensive upholstery over rotten frames. Strip the seats entirely down to the bare wire springs and steel structures. Sandblast the frames to remove the surface rust, repair any broken zigzag springs, and paint the entire structure with a rust-encapsulating paint. This stops old, orange rust dust from bleeding through onto your new carpets.
-
Padding and Upholstery: Rebuild the support structure using high-density modern foam bolsters, shaping them to provide better lateral support than the flat factory seats offered. When it comes to the outer layer, guide your decision based on your build goals. Selecting authentic auto seat upholstery—whether you are meticulously matching a rare factory-correct houndstooth fabric or upgrading to a fully custom, double-stitched Italian leather—is what ultimately makes the cockpit feel luxurious and brand new. Use a professional steamer to stretch the material tight, eliminating wrinkles.
Sound Deaden the Floor Pans for Modern Comfort
Classic cars are notoriously loud inside. They lack the extensive acoustic engineering and insulation found in modern vehicles. Without intervention, you will hear every rock pinging off the undercarriage, the drone of the exhaust, and the roar of the road.
-
Acoustic Mats: Before laying down the new molded carpet, cover the entirely painted, bare-metal floorboards with butyl rubber sound-deadening mats. These heavy, foil-backed sheets absorb structural vibrations. Apply them to the floor pans, the transmission tunnel, the inner door skins, and the roof structure.
-
Thermal Insulation: Over the butyl mats, apply a layer of closed-cell foam thermal insulation. This secondary barrier prevents the extreme heat of the exhaust and engine from radiating through the floorboards and baking your feet on long summer drives. This two-step insulation process adds a slight amount of weight but dramatically transforms the driving experience, making the cabin feel vault-like and solid.
Conclusion
Once the final bolt is tightened, the fluids are topped off, and the interior is vacuumed, the most nerve-wracking and exciting part of the restoration begins: the shakedown run. The first 100 miles are critical. You are not just going for a joyride; you are actively testing thousands of individual components working together for the first time. Keep your speeds low, listen intently for unusual squeaks or grinding noises, monitor the temperature and oil pressure gauges constantly, and be prepared to pull over at a moment’s notice. After this initial drive, put the car back on jack stands, check for fluid leaks, and meticulously re-torque every single suspension bolt and wheel lug nut.
Completing a full, bare-metal restoration is a monumental achievement that very few automotive enthusiasts successfully accomplish. It is a grueling test of endurance, finances, and skill. Yet, the reward of the build is unparalleled. Taking a forgotten, rusted shell that was destined for the scrapyard and transforming it into a roadworthy, gleaming masterpiece provides an immense sense of pride. When you finally turn the key, hear the engine roar to life, and shift into gear for that first open-road cruise, every scraped knuckle, frustrating setback, and late night spent in the garage instantly becomes worth it. Stay patient, stick rigorously to your vision, and take the time to truly enjoy the journey of classic vehicle restoration.